An introduction to the Site Manager
As you probably know by now you can use Quick 'n Easy Web Builder to build web pages for your web site. When your web site has more than one page they must all be part of the same Web Builder project file. A project file has the extension .wbs (webbuildersite). The Site Manager can be used to add, edit, remove and organize your web site.
Tip: Make sure all pages of a website are part of the same project, this way Web Builder will 'know' that the pages belong together and generate optimal HTML for your website.
Web sites always have a home page which is often called index, so for this reason Web Builder automatically adds this page to each new project. The names of the items (pages) in the site tree are the actual file names of the target HTML files, so if you named a page 'index' is will publish as index.html.
Important note:
The information in the Site Manager does not represent a folder on your harddisk! The pages and folders in the Site Manager will be only be generated when you publish the website. The pages and site structure will be stored inside the wbs project file.
Add a new page to your web site
Select the position where you want to insert the page, for example select the root (the top level item) to insert the page to the first level. Click the first button on the toolbar (New Page).
Web Builder adds the new page to your project and will automatically open it,so you can start building the page. To insert a new page as child of an existing page, first select the parent and click 'New Page'

The Site Manager toolbar has the following commands (from left to right):
New Page
Add a new page to your website.
New Folder
The New Folder command give you the possibility to organize your pages in folders.
External File
This option can be useful if you want to make an external file part of the project, so you can easily link it or make it part of the sitemap. And although this option was designed to include HTML files, it can basically used for any type of file. Note however that it will only be a link to the file. You will not be able to edit the file directly in Qucik 'n Easy Web Builder!
Clone Page
Make a copy (a new instance) of the selected page. Changes made to the cloned page will not affetc the orginal page. A clone is just a new page based on an existing page!
Remove Page
Remove the selected page from the current website.
Move Up
Move the selected page up amongst its siblings.
Move Down
Move the selected item down amongst its siblings.
Move Left
Make the selected item a sibling of its parent.
Move Right
Make the selected item the child of its preceding sibling.
Tip: You can also arrange pages by using drag and drop. Hold down the CTRL-key if you want to prevent the dragged item to become a child of the drop target. In this case the page will be moved below the drop target.
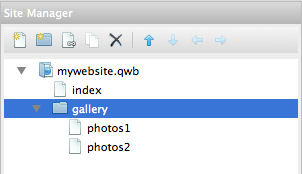
The first item in the Site Structure tree is the filename of the website (also called the root). The root can have one of more pages and each page can also have sub pages.
If you did not save your website yet, it will probably be called Untitled. Use the File menu to save your website and give it a more meaningful name like 'MyWebSite'. Note that Web Builder automatically adds the .wbs extension to the filename.
New Page
Add a new page to your website.
New Folder
The New Folder command give you the possibility to organize your pages in folders.
External File
This option can be useful if you want to make an external file part of the project, so you can easily link it or make it part of the sitemap. And although this option was designed to include HTML files, it can basically used for any type of file. Note however that it will only be a link to the file. You will not be able to edit the file directly in Qucik 'n Easy Web Builder!
Clone Page
Make a copy (a new instance) of the selected page. Changes made to the cloned page will not affetc the orginal page. A clone is just a new page based on an existing page!
Remove Page
Remove the selected page from the current website.
Move Up
Move the selected page up amongst its siblings.
Move Down
Move the selected item down amongst its siblings.
Move Left
Make the selected item a sibling of its parent.
Move Right
Make the selected item the child of its preceding sibling.
Tip: You can also arrange pages by using drag and drop. Hold down the CTRL-key if you want to prevent the dragged item to become a child of the drop target. In this case the page will be moved below the drop target.
The first item in the Site Structure tree is the filename of the website (also called the root). The root can have one of more pages and each page can also have sub pages.
If you did not save your website yet, it will probably be called Untitled. Use the File menu to save your website and give it a more meaningful name like 'MyWebSite'. Note that Web Builder automatically adds the .wbs extension to the filename.


Open an existing page
Select the item (page name) your want to edit and click the third button (from the left) on the toolbar (Edit Page). Another way to open a page is to double click it's name.
Clone an existing page
To make an exact copy of an existing page, select the item (page name) you want to clone and click the 4th button (from the left) on the toolbar to insert a copy of that page. Note that a new instance of the page will be created so you can fully customize the cloned page without affecting the original page!
Remove a page
Select the item (page name) you want to remove and click the remove button on the toolbar or press the Delete key on the keyboard. Note: You can not remove the last page in your web site.
Rename a page
Select the item (page name) and press F2 to enter the new name.
When you've linked to the page you are renaming (from any page within the web site), Web Builder automatically updates all the links for you, so you don't have to redo all the internal links.
Arrange Items
You can arrange items by using drag and drop, select the item and drag it to the position where you want to move it to or you can use the context menu (right click) to move the items to another position.
Using the context menu
When you right click on an item in the Site Manager the context menu will be displayed. By using the context menu you can quickly access the available commands for the specific item.

Initially Web Builder will give the new page an unique name like page1. You can easily rename this to something else by selecting the name and hitting the F2 key. Or right click the pagename and select Rename Page from the context menu. Next you can specify the new name. Press Enter to store the new pagename or Esc to cancel renaming.
Add a new folder to your web site
Select the position where you want to insert the folder, for example select the root (the top level item) to insert the page to the first level. Click the second button on the toolbar (New Folder).
Add a new folder to your web site
Select the position where you want to insert the folder, for example select the root (the top level item) to insert the page to the first level. Click the second button on the toolbar (New Folder).